Showing posts with label permaculture. Show all posts

Sunday, November 30, 2014

Biochar plaster

I fell in love with earthen plasters during my cob course. It is nice to have a building material that you can wash out on the ground right next to your garden. It is nice to know what is in your home is not toxic to anyone, and the production of it is not creating any toxins elsewhere in the world.

It is nice to be able to source materials locally, to dig up my materials from the ground. This is much more affordable as well.


I have worked with clay based plasters and lime based plasters, and recently was introduced to biochar plaster. At the Ecovillage Training Center at The Farm in TN, Albert is the biochar man. I have to admit a little skepticism when first introduced to the concept of biochar, but there are so many people who report amazing results that I am sold. 

Recently the permaculture apprentices at the Ecovillage Training Center applied some clay based biochar plaster in The Prancing Poet (event space).  Albert mentioned that the biochar blocks electromagnetic radiation such as those that come from computers, microwaves etc. I was curious so I looked around and found a very interesting article on biochar plaster. 

Biochar as Building Material for Optimal Indoor Climate


The article mentions that biochar plaster is being used to restore old wine cellars. It regulates humidity for the wine, helps stabilize the temperature, and filters the air. 

I had yet to complete a final plaster coat on the cob bench around our woodburning stove, so I decided to do my own experiment.

I chose to use a 50/50 lime and masonry sand mix. with at least 20% biochar. The biochar was beautiful when wet, bluish-black. As lime plaster does, the biochar mix still smoothed into a nice finish after burnishing, looking almost like stone. 

I did have to baby the plaster a bit because humidity was low in the cold air, and I wanted to keep the cob at an ideal temperature for lime plaster curing so that I did not get large cracks (the last lime plaster I did was in ideal humidity and temperature and did not require water spritzing regularly as this mix did).

The plaster turned out great. I head to leave and come back to the Ecovillage Training Center, so I asked my husband to continue to spritz it for a week and keep an eye on it, then slowly decrease frequency of spritzing while it cured the our cold temperature with the stove running. I am very curious of the effect of the humidity regulating biochar on the lime plaster, but would need to try the plaster in different conditions to know that the change was related to the biochar in particular. 

I hear it is doing great and am looking forward to further biochar plaster on the walls. I will be keeping an eye on summer humidity in our home. I am looking forward to some changes in this!

Next time: More fibers, try a natural tint, do this plaster when it is warmer out!

Monday, September 22, 2014

Monmoth Food Forest Tour

This posting is mostly to keep my own notes, but why not share what I learned on a tour of a Food Forest? Enjoy and ask questions!
Gary Fernald started planting trees near Monmoth, IL in 1967. He was inspired by Pecans and they've become his expertise. He found there was a need to establish or re-establish locally verdant groves to nourish and thrill people. So he went looking.
Hazelnuts in the husk
Northern Pecans can be massive trees. Some were found on Adams Island near Clinton, IA. Also along Rock Creek and Pleasant Creek. These areas are closed in the fall (Sept. 15 to Jan) for waterfowl, but Gary was able to get a permit from Army Corps of Engineers and Fish and Wildlife to gather nuts to plant groves elsewhere in order to preserve and breed pecans. He planted groves north of Chestnut Mountain and by Muscatine, just by the lock and dam below the Gorham residence.

Gary has bred many trees and there are even some cultivars named after him for sale from tree catalogs. Two that we saw on our tour were Hark and Lucas.
Japanese Heartnut - this nut can be shelled whole.
More Notes:
The Hican (sp?) A cross between a hickory and pecan can occur naturally. Some pecans bear hickory (shagbark) traits. Not as productive as pecan, but can be more flavourful.
English Walnut
Regarding English Walnuts, they are hard to do. Some produce OK. They are also different (bearing) year to year. English walnuts are easier to crack and will fall out of husk onto ground. Chris Knows a tree that drops nuts onto a sidewalk in the Quad Cities and they just pop out of the shell! I should ask him for a graft...
Chestnut trees with their prickly husks.
Mulberry: Illinois ever-bearing might be one of the best species of mulberry – I need to graft this onto existing trees on the farm!
Pawpaw - unfortunately not ripe in time this year
Grafting: Keep grafts at 80F to “callous” use ~6” of scion (fruiting stock) with buds onto rootstock. Use a sharp knife or bench tool. Bench graft with pencil-sized stock. Bark graft several pencil-sized sticks into side of bark of 3-6” branch, trimmed of growth just above graft. Wrap with just about anything, electrical tape works well. Grafted (any) can produce in 3-5 years (walnut, pecan, etc.) Practice to get good at these techniques and let someone show you that knows what they are doing. Gary may have a workshop coming up! Butternut and English walnut can be grafted onto Black walnut!


Wednesday, July 16, 2014

Mosaic story floors


I started tiling last year when Sarah Haas came through and showed me what she leaned with Dan Phillips, other tilers, and then through trial and error of her own professional tiling efforts. She showed me how to tile with commercial thin-set mortar and grout with scrap tile. I decided that I wanted to complete the stairs with scrap tile and bottle caps. 

This year I started a new project involving bottle bottoms. I cut the bottom off of beer bottles with a tile saw and mortared them in.  To strengthen the bottoms (even though they are pretty flat) I filled them in with mortar as I set them. 

As always I had to try new things. I started with the thin-set mortar for tiles, but remembered how easily some of the tiles on the stairs had popped out pre grout. Instead, I grabbed a bag of premixed brick style mortar.  Once dry these tiles were not going anywhere. Thin-set mortar allows future changes if you may want to scrape everything up and try again, but after this much work with mosaic, I can't imagine wanting to redo the floor. 

I then mixed my own mortar for a bit, with local masonry sand from the quarry and a bag of portland cement. I found with this that sometimes there were still small pebbles that would make an uneven setting for the tiles and they would pop out. Next time I use this sand I will pre-screen.  Darrell, a contractor staying at moonCat right now, brought a bucket of fine sand scooped from a local property. Even though this contained a small amount of silt the mix held great, and this was my absolute favorite, until the cats found the bucket and made it into a litter box.

I did consider using an earthen plaster of clay, sand, starch, matrix material (such as straw, manure, etc.) and water. I decided against this because the house is in the ground. If by chance flooding occurred, I would need to redo the natural plaster and tile. With the amount of time I put into mosaic work, I think I will seek sustainability by using materials that will not need to be continually consumed, but will last for a long time (use of portland cement instead of natural plaster).

I did start with commercial grout, and decided to end with commercial grout, but recently spoke with a friend about mixing my own. My friend Michael (that I met at Earthships) recommended a fine sand mix very similar to the actual mortar I was making. He said mixing in the structural poly fibers used for cement may help prevent cracking. I may play with adding lime to the grout as well. At The Farm Ecovillage Training Center I had seen that the home Albert Bates was staying in had bottle caps laid in a lime plaster, but it did not hold well. Perhaps a mix of some portland and lime . . . and a little soaked sawdust?

I prefer to use natural or "waste" materials when possible. With this floor I used scrap tile from a mix of other contractors, the Habitat For Humanity Re-Store, and bottles and bottle caps that were being thrown away from local bars. I will admit that on one dark and frustrating night I decided to "Just finish it quickly!" by laying actual square tile bought from a store and did buy a couple of boxes of cheap tile.

I have come to realize that my tiling values include local material sourcing and waste/recycled materials as much as possible, but also there is a measure for my time and effort. I wanted to make the tree much larger with the bottle bottoms, but this is very time intensive.  I pushed myself for long days to complete the mosaic tile quickly and used all of my great TFH kinesiology pain releasing techniques to support days of statically bending over and mortaring in bottle caps and bottle bottoms. The tile portions go very quickly and are not quite so static. 

I can thank craigslist, local bars, and local flooring contractors for most of my tiling material! Thanks to Phoenix for all of her help placing bottle caps, and WWOOFer Chris Burke for hours of helping me to cut bottle bottoms.

I really enjoyed this project and have found it very rewarding. I am looking forward to more! As little girls at moonCat plot about who will own the house when I die I feel that my mosaic story floors can promote inspiration, creativity, culture beyond my lifetime. 


Tuesday, June 10, 2014

Farm Tour

This past Saturday we hosted a farm tour at moonCatlife. Jerome showed everyone around our beginning food forest and I took a turn showing building and retrofit projects. Phoenix showed everyone the kittens. I enjoyed making some new friends in the area. 

I have been hoping to project some movies in the barn and one of our visitors just so happened to have an old screen lying around. After connecting with a belly dancing instructor I am hoping to get some lessons going here along with yoga and meditation.                                   

We walked on our new paths that Darrell spent so much time mulching and looked at the new apple trees. The apple area also has a mix of herbs and some transplanted gooseberry bushes and wild grapes. I wanted to try a couple of hardier pecan and almond trees in this area as well so we planted them here.

The apples were planted next to a group of trees that grew over a large strawberry patch. There are mulberries, more wild grapes, rye, and some asparagus as well as other wild edibles of the area such as wood sorrel, lambs quarters, and milk weed (pods).  Clover and medic are growing throughout fixing nitrogen, drawing bees, and smelling wonderful.

This year Jerome has added a couple of pigs to our permaculture system and they are clearing the land for planting in our "pig tractor".  I added some swales for redirecting rain water.  We planted larger willows to boarder the farm that should have more stamina than smaller starts from the past. A path is in progress next to the willows now.

We enjoyed sharing knowledge and learning more tid bits about wild edibles and other natural ways of living from those who came.
 Here's to friends, nature, and innumerable possibilities.

Wednesday, January 8, 2014

The Farm

When I took my cob course in Tennessee this past October I noticed that an eco-village training center I had seen online was a close drive.  We had one day off in the middle of our course and a couple of my fellow eco-geek girls came along to check out The Farm with me.

Now, as much as I am interested in intentional community and eco-villages I get a little uncomfortable with words like commune and fascism. Though, realistically if you dive into philosophy of fascism versus what has actually played out it really is full on interesting concepts, and really, what was Marx actually saying? Fun debates.

 I want to live somewhere that people share because they choose to, where independence is valued, but community flows freely as choice.  Somewhere that people are valued and supported to realize their full creative potential by rising above the rat race and ensuring basic needs are met; these are the strengths I see in a sharing community. These are things I have gained from intentional communities in the past, though I have never been a member of a common purse. And while I'm on a role, I think that it is more important to realize my own equality and see what flows from there than to assume "the man" owes me equality.  I do, however, have respect for those that strive for equality and create communes that work and create conscious change, but have seen a lack of individual "ownership" transfer to a lack of respect for property, and sometimes scarcity. This is where my mind flows when I think of "communes".

 Stained glass dome at The Farm


I am intrigued by the story of The Farm as it morphed from commune, to intentional community to become self-supporting. Googling for more precise definitions I found this fun link to explore the definitions at planetfriendly.net

The eco-village training center at The Farm has a number of natural building projects going. I bumped into Jason "the green resourcerer" and he explained one of the eco-village projects to me that included fun building techniques I am interested in like straw slip, in-floor heating, more cob, bamboo, cordwood, and sawdust for insulation.  They were using cordwood to tie together two layers of cob with a space in the middle filled with sawdust for insulation.

Lion sculpted out of cob


The Farm has so much interesting history to share with anyone interested in different forms of sharing economies from co-housing to full blown communes. Now it has a midwifery center (that I did not get to visit yet) and the visitor's center is full of interesting resources . . . I just wanted to take pictures of the bookshelves and start googling subjects & authors . . .and a bookstore where I got one of my new favorite books Ecocities, rebuilding cities in balance with nature by Richard Register. 

 Slip straw I have been told works well as insulation

Cob sculpted fireplace 

Compost toilets & solar shower with Dawn

I would love to go back and experience more of their eco-village training center, natural building, vehicle conversion, and midwifery clinic.


Wednesday, March 28, 2012

hoobastank culture, I mean . . . hugelkultur


    Hugelkultur: article below from the website http://www.richsoil.com/hugelkultur/

    a page on permaculture methods

    garden beds: hugelkultur instead of irrigation

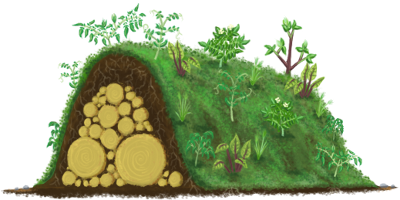
    raised garden beds hugelkultur logs and soil after one month

    raised garden bed hugelkultur after one month

    hugelkultur

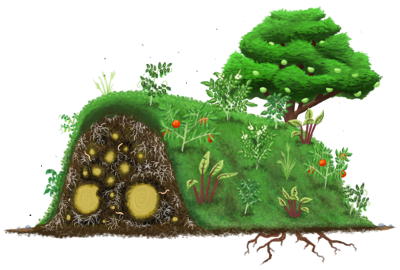
    raised garden bed hugelkultur after one year

    raised garden beds after two years

    raised garden bed hugelkultur after two years

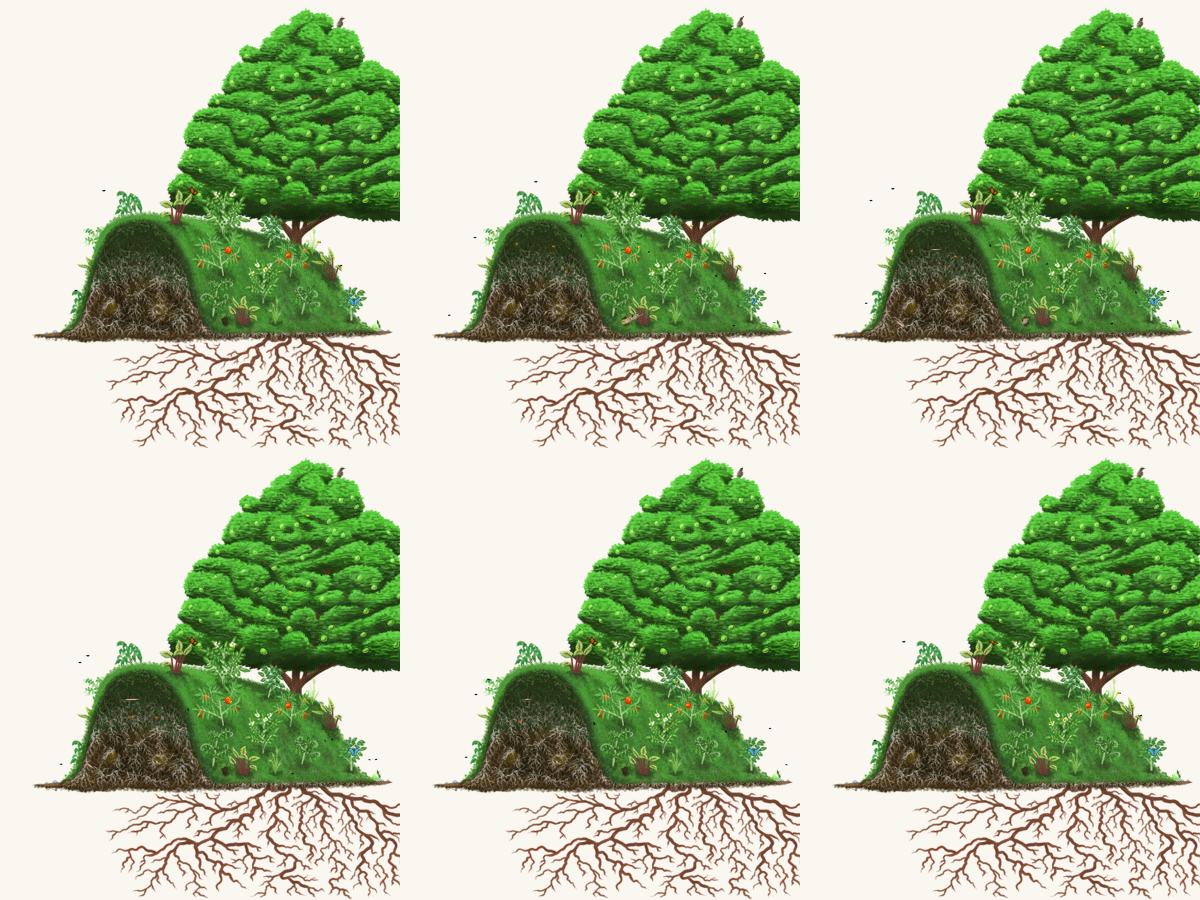
    raised garden beds hugelkultur after twenty years

    raised garden bed hugelkultur after twenty years


    hugelkultur raised garden beds in a nutshell:

    • grow a typical garden without irrigation or fertilization
    • has been demonstrated to work in deserts as well as backyards
    • use up rotting wood, twigs, branches and even whole trees that would otherwise go to the dump or be burned
    • it is pretty much nothing more than buried wood
    • can be flush with the ground, although raised garden beds are typically better
    • can start small, and be added to later
    • can always be small - although bigger is better
    • You can save the world from global warming by doing carbon sequestration in your own back yard!
    • perfect for places that have had trees blown over by storms
    • can help end world hunger
    • give a gift to your future


Jerome ran across hugelkultur in a Sepp Holzer book on Permaculture. We have a lot of tall weeds and some rotten wood around the farm. As mentioned above there are many immediate benefits as well as carbon sequestering. Carbon sequestering helps to prevent further buildup of Carbon in the atmosphere from the decay of the wood. In a way lessening the growth of the greenhouse effect in the atmosphere.

The compost that we added on the top of our raised beds on wood/woody weeds is from the city of Davenport. The city has a compost facility where residents can drop off "yard waste". They then compost these clippings and sell the compost. I like the idea of supporting a city compost system.

I looked into the different organic mixes the city offered. One was mixed with sludge from city waste facilities sometimes referred to as "biosolids" (though biosolids are sometimes differentiated as having gone through more of a treatment process than the general term "sludge"). There seems to be quite a controversy about gardening with sludge. This link shows a little about the sludge controversy. We got the compost without sludge, but unfortunately this type no longer comes in bulk. We will, however be re-using the bags in the bottom of our pounded tires.

The beds in this picture are planted with lettuce, kale, and swiss chard. If you look closely at the top of the photo you can see some of the rotten wood we are putting inside the piles. These beds are between buildings where the greens will receive partial shade. Last year the heat caused our lettuce to bolt pretty quickly in the sun, but this year it will be more shaded.