Tuesday, June 10, 2014

Farm Tour

This past Saturday we hosted a farm tour at moonCatlife. Jerome showed everyone around our beginning food forest and I took a turn showing building and retrofit projects. Phoenix showed everyone the kittens. I enjoyed making some new friends in the area. 

I have been hoping to project some movies in the barn and one of our visitors just so happened to have an old screen lying around. After connecting with a belly dancing instructor I am hoping to get some lessons going here along with yoga and meditation.                                   

We walked on our new paths that Darrell spent so much time mulching and looked at the new apple trees. The apple area also has a mix of herbs and some transplanted gooseberry bushes and wild grapes. I wanted to try a couple of hardier pecan and almond trees in this area as well so we planted them here.

The apples were planted next to a group of trees that grew over a large strawberry patch. There are mulberries, more wild grapes, rye, and some asparagus as well as other wild edibles of the area such as wood sorrel, lambs quarters, and milk weed (pods).  Clover and medic are growing throughout fixing nitrogen, drawing bees, and smelling wonderful.

This year Jerome has added a couple of pigs to our permaculture system and they are clearing the land for planting in our "pig tractor".  I added some swales for redirecting rain water.  We planted larger willows to boarder the farm that should have more stamina than smaller starts from the past. A path is in progress next to the willows now.

We enjoyed sharing knowledge and learning more tid bits about wild edibles and other natural ways of living from those who came.
 Here's to friends, nature, and innumerable possibilities.

Friday, May 16, 2014

welcoming friends

I love community and working with a group with shared passions. Being in Illinois doing sustainability and community felt a little lonely for a while. We had plenty of people coming through, but for short periods of time.

This year Meghan Hollister contacted me saying she was interested in learning more about our CSA. I asked her to take on a position organizing it this year while we teach her the ropes. She accepted excitedly and began work just as I left for a month in Tennessee for my apprenticeship in biofuels at The Farm Ecovillage Training Center. At that time I had someone else interested in learning about TFH Kinesiology and natural building and willing to be at moonCat regularly to help with building WWOOFers. A few others contacted us to share in our work in sustainability on a more regular basis.

Right before I left for TN my friend Ariel contacted me. I met Ariel in Taos, NM. When I interned at Earthship headquarters she worked there. Ariel and her new roommate had been looking at pictures of a cob build when they realized we were all connected. I met Andy Sahn at Christina Ott, Deanne Bednar, and Chris Mcclellan's two week cob building workshop last October in TN. Andy had apprenticed with the Cob Cottage Company and traveled around to work and learn with other Cob Cottage builders.  Andy and Ariel skyped with me one week before I was traveling back to TN to apprentice at The Farm Ecovillage Training Center and I got to spend time with them in Nashville and see what they were doing.

Andy's Gazebo build


While visiting everyone I found out both Ariel and Andy had been working with Marcus Sisk. I met Marcus in Guatemala at an Earthship build. He came back to the states and completed the Earthship Academy and started his own Earthship in TN. A couple of years ago I traveled out there to visit him and helped to pound his first row of tires. This time I got to see how much he has gotten done and was amazed.

Marcus' Earthship

At The Farm Ecovillage Training Center I learned that the Jason Deptula, whom I was apprenticing with, had lived at the same small yoga community that I had studied yoga at. It was fun sharing stories of magical experiences and interpersonal journeys of awareness.

 Jason at the house he is building


Leaving TN I felt loved and connected, not to mention all of the great new ideas I brought back from those sharing my passions.

Coming back to moonCatlife I met some of Meghan's friends who share our vision for a resilient and sustainable community. I look forward to growing and building visions with like-minded people who can transcend small differences personal dramas to create a more beautiful world.

Wednesday, January 8, 2014

The Farm

When I took my cob course in Tennessee this past October I noticed that an eco-village training center I had seen online was a close drive.  We had one day off in the middle of our course and a couple of my fellow eco-geek girls came along to check out The Farm with me.

Now, as much as I am interested in intentional community and eco-villages I get a little uncomfortable with words like commune and fascism. Though, realistically if you dive into philosophy of fascism versus what has actually played out it really is full on interesting concepts, and really, what was Marx actually saying? Fun debates.

 I want to live somewhere that people share because they choose to, where independence is valued, but community flows freely as choice.  Somewhere that people are valued and supported to realize their full creative potential by rising above the rat race and ensuring basic needs are met; these are the strengths I see in a sharing community. These are things I have gained from intentional communities in the past, though I have never been a member of a common purse. And while I'm on a role, I think that it is more important to realize my own equality and see what flows from there than to assume "the man" owes me equality.  I do, however, have respect for those that strive for equality and create communes that work and create conscious change, but have seen a lack of individual "ownership" transfer to a lack of respect for property, and sometimes scarcity. This is where my mind flows when I think of "communes".

 Stained glass dome at The Farm


I am intrigued by the story of The Farm as it morphed from commune, to intentional community to become self-supporting. Googling for more precise definitions I found this fun link to explore the definitions at planetfriendly.net

The eco-village training center at The Farm has a number of natural building projects going. I bumped into Jason "the green resourcerer" and he explained one of the eco-village projects to me that included fun building techniques I am interested in like straw slip, in-floor heating, more cob, bamboo, cordwood, and sawdust for insulation.  They were using cordwood to tie together two layers of cob with a space in the middle filled with sawdust for insulation.

Lion sculpted out of cob


The Farm has so much interesting history to share with anyone interested in different forms of sharing economies from co-housing to full blown communes. Now it has a midwifery center (that I did not get to visit yet) and the visitor's center is full of interesting resources . . . I just wanted to take pictures of the bookshelves and start googling subjects & authors . . .and a bookstore where I got one of my new favorite books Ecocities, rebuilding cities in balance with nature by Richard Register. 

 Slip straw I have been told works well as insulation

Cob sculpted fireplace 

Compost toilets & solar shower with Dawn

I would love to go back and experience more of their eco-village training center, natural building, vehicle conversion, and midwifery clinic.


Monday, January 6, 2014

heated Cob bench & thermal mass

I am really really starting to love the concept of thermal mass. The first time I heard about thermal mass was from Earthships. The tires and the berm around an Earthship provide thermal mass that acts as a temperature battery storing the heat or cold that you expose it to (integrating passive solar/south facing windows etc. to heat it up in cold times).

Deanne introduced me to a rocket stove DVD with Ernie & Erica Wisner and Paul Wheaton. It is expensive, but is a 4 DVD set with lots of information. In the DVD they discuss all sorts of good stuff relating to heat, fire, thermal mass, convection/conduction/radiation, and efficient heating. I went in with a friend to get the DVD and feel it was very worth it. I have started to think of heating homes differently.

I used to be one of those people who felt slightly frozen in the winter because heated air just didn't seem like enough to me. I felt I needed to soak in warm water or touch something warm to really soak in the heat (or gather my ambition for some kundalini yoga). Now I have learned that heating the air (convection) is likely the least efficient form of heating. Then we seal up houses to keep the warm air in and end up with stale allergen populated air.  No wonder everyone has allergies.

Heating thermal mass, which slowly releases the heat is heating by radiation and is very efficient. My body really likes this. Who doesn't like sitting on a warm bench in the winter . . . not counting menopausal women. Also, the heat is more regulated.  In the DVD someone mentions a house in Norway or Sweden that is heated with a masonry heater (using the concept of thermal mass & heating with radiation) and has free airflow to the outside just below the roof, staying plenty warm.  There are all sorts of ways to heat thermal mass from fire, to passive solar & glycol panels with in floor heating, and even in floor electrical heating mats (ease of installation & use but less efficient).   There are varying densities of thermal mass, from cement slab, even tile, to cob, and stone .  . . and so much more.

This all works up to: we are working on a heated cob bench, or two. The cob and stone help to store heat inside the house so it is not whisked out of the house if the door is opened or windows are not perfectly sealed.  The more thermal mass you have the more your desired temperature wants to stick to your living space.

One is in the entry room/inner almost-soon-to-be greenhouse.
The thermal mass is made of local limestone from a quarry and cob (also a nice sand & clay mix from a local quarry).
 Top picture is what we started with. We decided to take out the closet & table (doors are already off of the closet).
Everything is out. We tiled the walls. The bench goes in in a "U" shape.
Beginnings of a bench. We are having a cob mixing party tomorrow to bulk this up before sculpting and putting on a finish plaster coat. I'm not completely sure we will have enough materials to finish right now. The local quarries said that their stone is not accessible because it was frozen solid . . . our weather station said it was -17 degrees out this morning (without windchill factored in)! I hear this will be over soon though and I can access materials again.
The window between the bathroom and the entry room. I found these used glass floor tiles at the Habitat for Humanity Restore and knew they would fit the empty window frame perfectly; I just mortared them in. I thought about using bottle bricks but the frame is only about 1 1/2-2 in and the outsides slope. This was quick, easy, and fun. I like how it looks.

I will post a follow-up when the bench is finished!


tiling in retrofit

This past summer we had someone come to visit who is interested in intentional community. She stayed with us for a couple of weeks and we discussed community and our experiences with it and shared knowledge. While she was here Sarah Haas shared her tiling knowledge with us.

Sarah is a dancer who decided that she wanted to build her own home and performance structure that could go with her as she traveled the states.  When she told me she had interned with Dan Phillips I was excited to pick her brain because I had found his TED talk very inspiring. Dan Phillips gave a talk on building creatively with reclaimed materials in Texas.  While there Sarah gained a foundation of tiling knowledge and then expanded her knowledge to do some tiling professionally.

The first project we worked on was a small table. Sarah cut cement backer board and we used Versabond thin set mortar to set the prearranged (largely by Phoenix) scrap tile pieces in place. I know that when working with plasters and cement the right mix means lasting work. Knowing this is a good brand and how particular Sarah is about work that will last I will probably stick with this unless I hear otherwise.
The line of blue dragons' tears down the center Phoenix collected somewhere random.

Once the mortar had been given enough time to set (about a day or check label) we squished in a reddish grout. Sarah was a little nervous about staining the tile with a darker grout but Phoenix picked red and we decided to go with it. Once applied we sponged it off the tile within 2-3 minutes and then wiped any remaining grout off the tiles with a cleanish rag. There was very little staining. A couple of the white tiles had the tiniest amount of color change.  After grouting we used a water sealant, and quickly scrubbed it off the tiles before it could dry on them and make them look foggy. 

I showed a friend later how to tile a coffee table. It was much easier to grout when we were able to keep the tile pieces level by varying the amount of mortar on the individual pieces of tile. When using scrap tile the pieces have different thickness and keeping the pieces level not only makes grouting easier but minimizes sharp edges that could stick out. 


The table turned out amazing! Second project: stairs. We have a few stairs leading down to the kitchen that are made of wood. Each stair had a small lip that stuck out. Jerome said that this is because of a visual effect and how our brains interpret depth. People are more likely to trip without that extra lip, but it would be really hard to tile. So I got out the sawzall and butchered the stairs as I cut off the lip. Then we laid cement backer board to support the tile and create and even surface to prevent future cracking. 

The tile we used came partially from what Sarah brought that people had given her as scrap and what a friend had given us from someone else's left over tile. I decided I wanted to get creative and use our collection of bottle caps that Phoenix had claimed. This was fun but did take a little longer to lay the bottle caps. We cut tile for the step edges to that there would be not sharp edges.  This was the first time I actually used my tile saw for tile. Previously I had used it to cut glass for bottle bricks. 

 I took the most time on the top stair. At first I really got intricate and took my time . . . then I decided the stairs needed to get finished more quickly because they were being walked on and pieces were getting knocked off and sideways. . . so a number of people chipped in to make our small community stair mosaic.
 Phoenix designed the center that looks like a ship anchor/bird and Jerome finished it by grouting her creation. Before she left Sarah designed the golden cap portion near at the right that looks like a sun and the trees on the side. Phoenix and our WWOOFer Sam from Utah designed the sides of the top two stairs. A WWOOFer couple from Ohio helped to grout and water seal a couple of the stairs. Our neighbor Donna contributed clear marbles left over from tiling her coffee table (I love how these feel on my bare feet).

When applying the water sealant I used two different brands. The brand "Miracle" that Sarah recommended seemed to soak into the grout much better. The cheap brand kind of rolled around on the surface a lot and needed a lot more work to apply. 

I love sharing knowledge and stories. It is fun to read the stories in our mosaic. The point beer caps are from every time Jerome's family visits from Wisconsin. The bird tile is a hot pad I found at a local thrift store and grabbed because I wanted to copy the bird for a sketch. Gluten free cider caps tell their own story. Some of the scrap tile came from a CSA member who snatched up a bunch of tile a friend was going to throw away and shared with us.  Jerome probably knows more about the other beer caps, and maybe which WOOFers drank each. . . or maybe not, but I really like the bottle caps and would like to do more with them. 

I can claim that the tiling fits in with sustainability because we are repurposing scraps and "trash".  Done right tile can last a long time, which also is a form of sustainability.  A lot of floors include poly something or other, and maybe some of my materials do;  I think it is minimized.  There is a bit of a trade-off in the use of mortar and grout with embodied energy, but creating a creative and lasting mosaic is worth it to me.

Tile can also be laid in an earthen plaster, but our home is in the midwest and partially in the ground so I want to avoid possible moisture issues by going with more traditional tile methods on the existing cement floor.  

Friday, December 6, 2013

the Strawbale Studio part II

Here is a video I found online where Deanne gives a brief tour of The Strawbale Studio.
She is offering internships in January and Feburuary!


This is a picture inside The Strawbale Studio sculpted out of cob. I like the branch added at the top. 
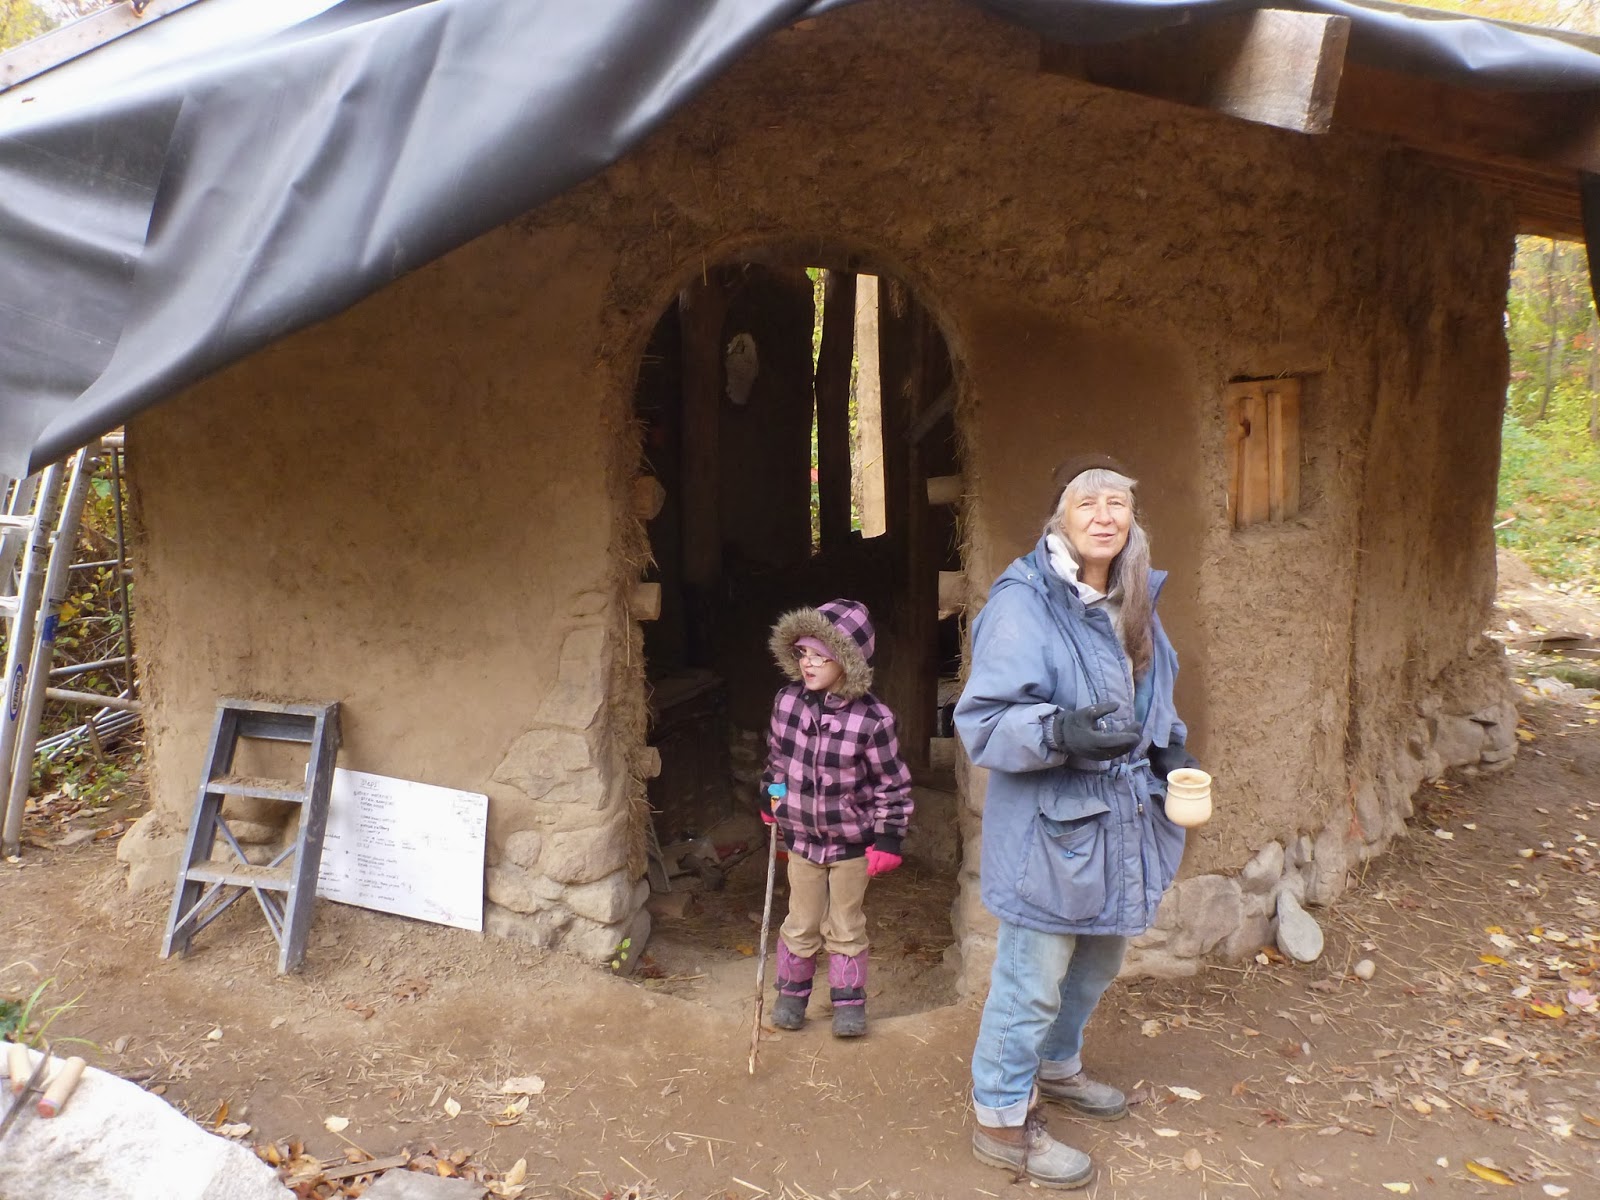
Deanne and Phoenix in front of the in-progress hobbit sauna.


Holes for pipe inside the sauna where the wood burning stove will go. 

A fish sculpted on the side of the rocket stove.


A spiral hut

A soon to be children's house 

Inside the children's house. The floor has the exhaust of the rocket stove running through heating it.

 Deanne at her rocket cookstove made of thrown together bricks
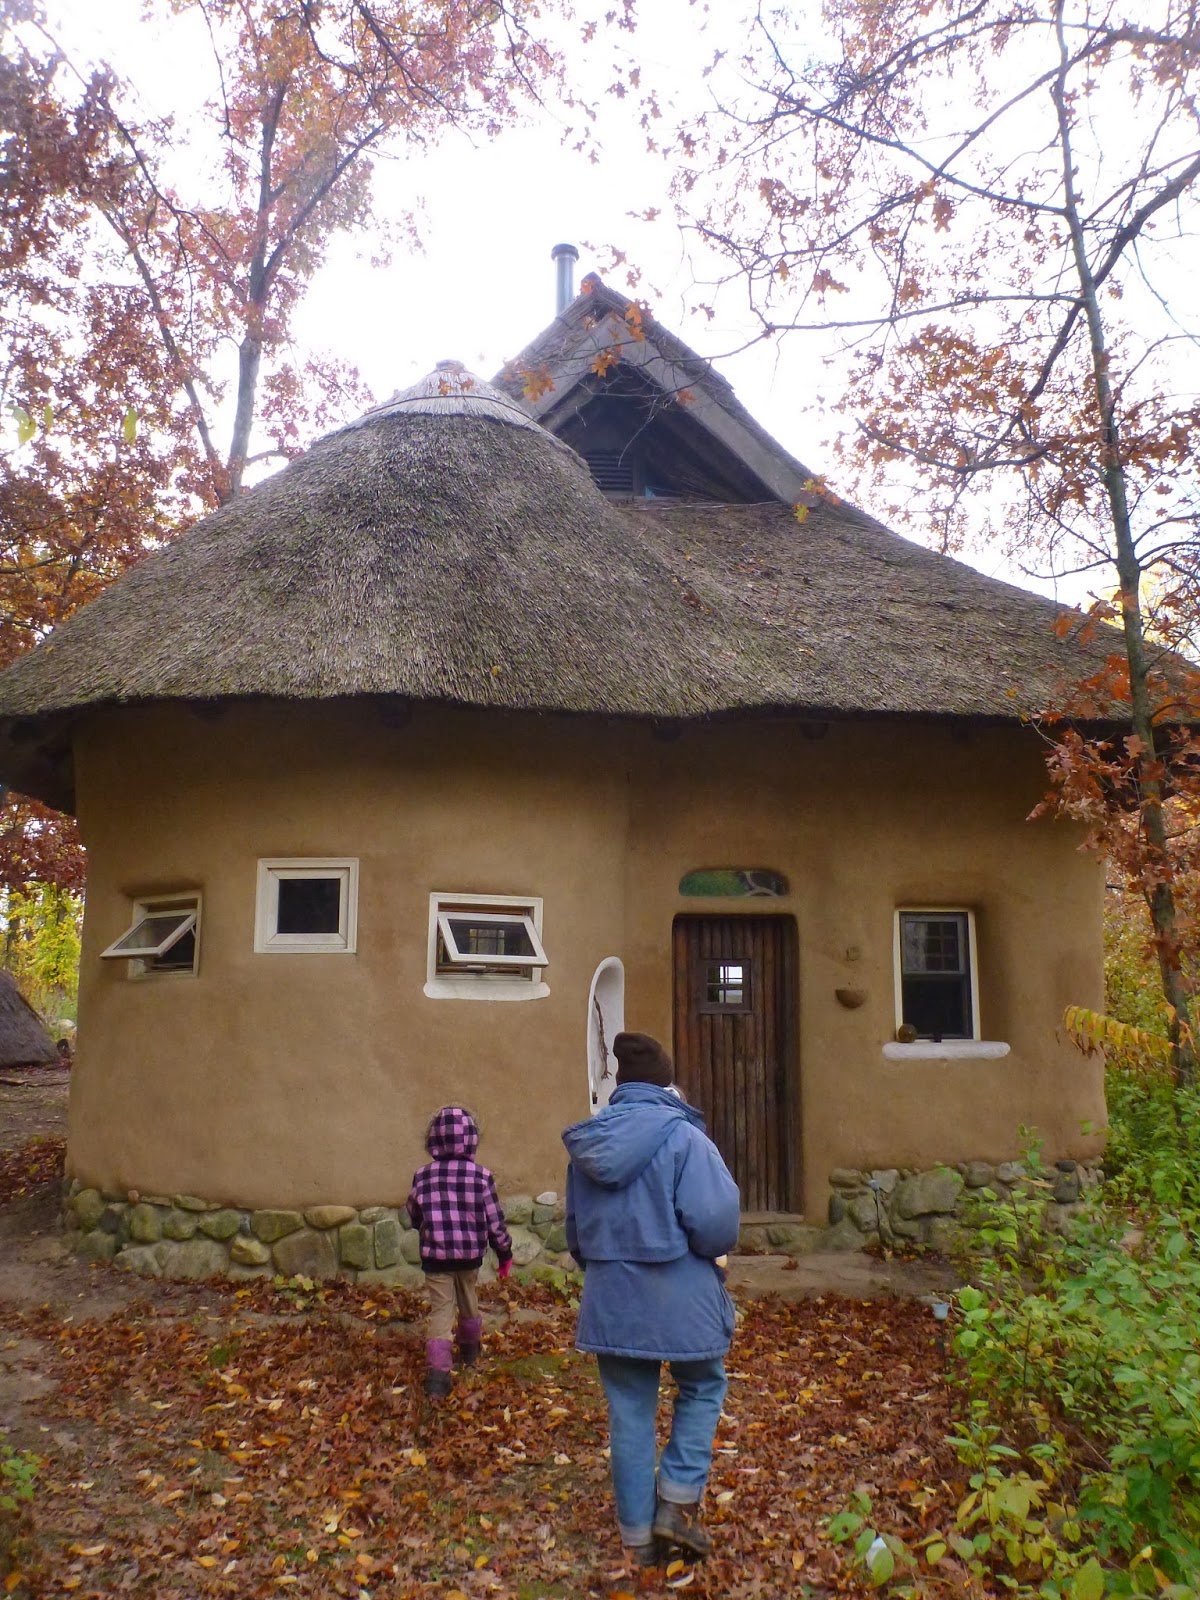
One thing I love about Deanne--everything is useful and everything is art.

Tuesday, December 3, 2013

the Strawbale Studio

          One of the instructors at the cob workshop that I took is Deanne Bednar. Deanne is an amazing artist and has done illustrations for books like The Hand-Sculpted House .  I was impressed to hear that she is building cob and strawbale houses in the midwest. Previously I had heard that people in the midwest had all kinds of mold problems with cob because of our high humidity.  THEN I head that Deanne was building a hobbit sauna! I had to get in on that, as any sustainable building sci-fi geek would . . .


          I made a visit to Deanne's Strawbale Studio in Oxford, Michigan. My Phoenix, my friend Lexi, and her daughter willow came along. We all mixed cob together. One thing I love about a cob construction site is that kids are always welcome.

         Deanne also thatches roofs (as seen on the Strawbale Studio roof) and builds Rumford fireplaces, has a beautiful outdoor cob fire oven, and a rocket stove too.  Because I am learning about rocket stoves right now (and building my first one) my favorite part of the visit was talking about rocket stoves, watching the Ernie & Erica & Paul Wheaton's rocket stove DVD, and talking about Deanne's upcoming rocket stove workshop. My other favorite part was just spending time with Deanne's creative and lively personality (we practiced NVC too). 


 Picture below of a traditional wall plastered over with an earthen/clay based plaster and rocks to look like a rock wall. I plan to do this in my retrofit. 
outdoor cob fire oven, hand-sculpted


Living roof


Farm shed on the outside


cozy on the inside. A Rumford fireplace built by Deanne


More to come on The Strawbale Studio and Deanne's Hobbit Sauna in the next post